
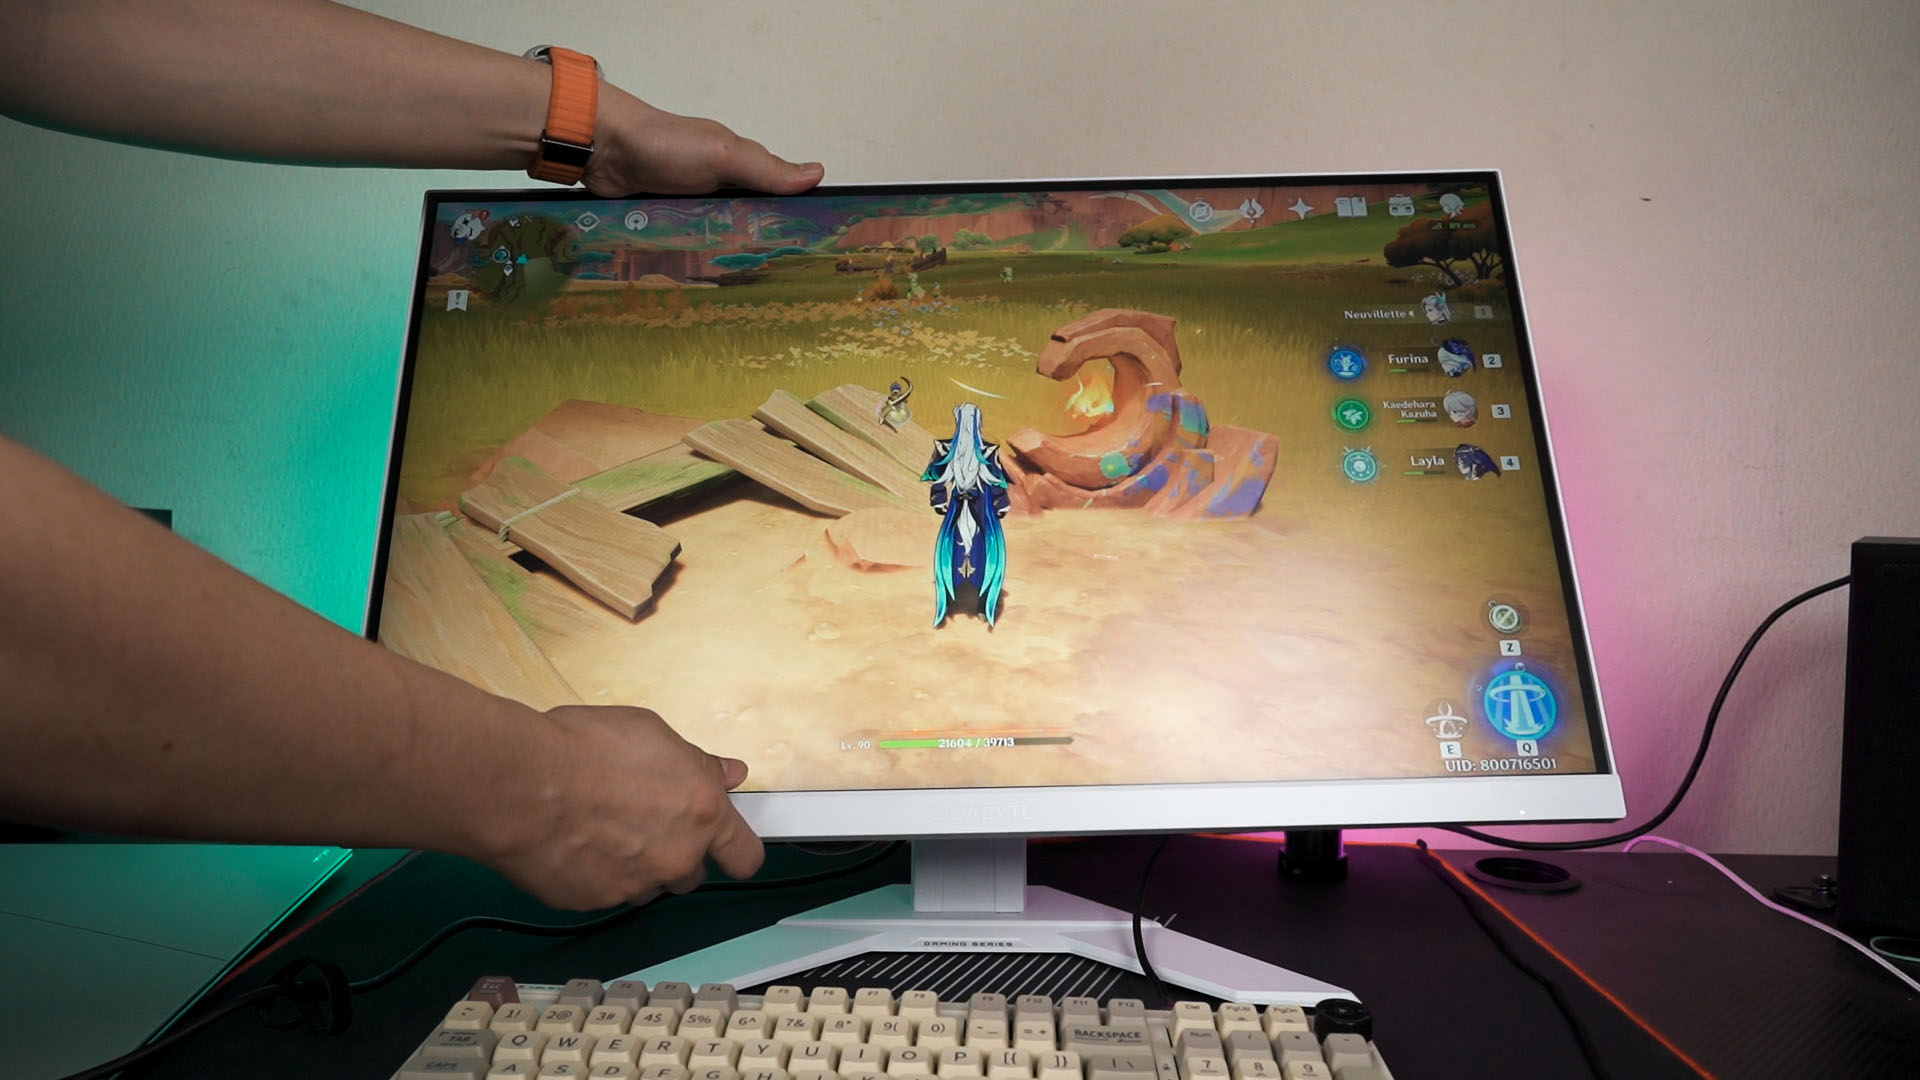
Introducing, this new monitor from Gigabyte. It’s the M27QA ICE – a 27-inch 1440p monitor and it is available in the elusive white color. Well, not really white-white, but it’s slightly more blue – hence having the word ICE in its name since it’s ice cold. That’s something that I came up with, not Gigabyte. Having a white monitor is a pretty rare thing to have – and that’s why we’re taking a look at this monitor today.
Let’s start with the panel quality first. As the name suggests, it’s a 27-inch screen with the SS IPS panel – no idea what SS means – and 1440p in resolution. The refresh rate is at 180Hz as well – and we’ll talk about this later.

The screen quality is actually quite okay. We can get around 100% of sRGB and 96.06% of DCI-P3 color gamut coverage with a very low delta E number. That’s great in terms of the color reproduction. As for the brightness, this monitor can achieve a maximum of 355 nits in SDR mode and around 470 nits in HDR mode. Impressive so far.

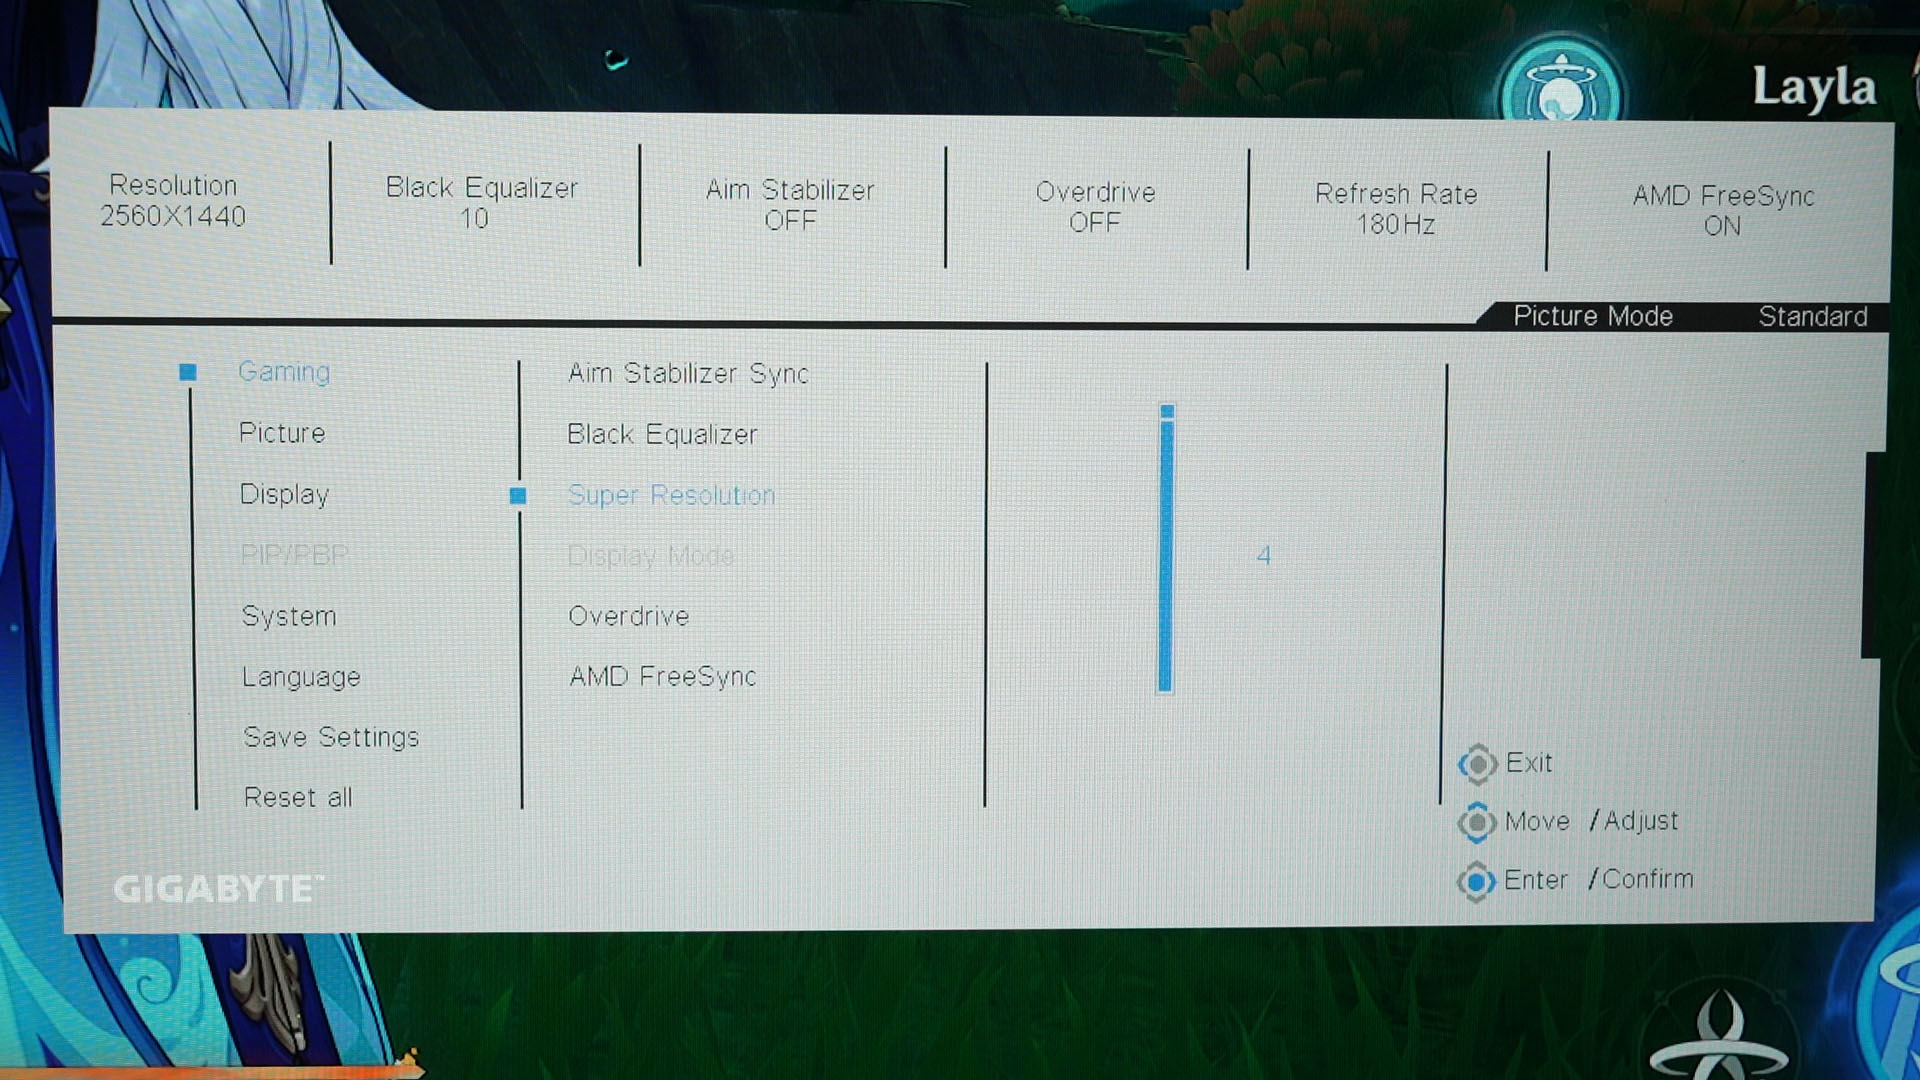
Since it is an IPS panel, the the viewing angles are great as well – and it just looks great. And it even has more features too. Housed inside the OSD menu that is controlled with the joystick at the back right side, I want to highlight 3 main features.

First, this monitor has AMD FreeSync. Please enable this so screen tearing is mitigated.
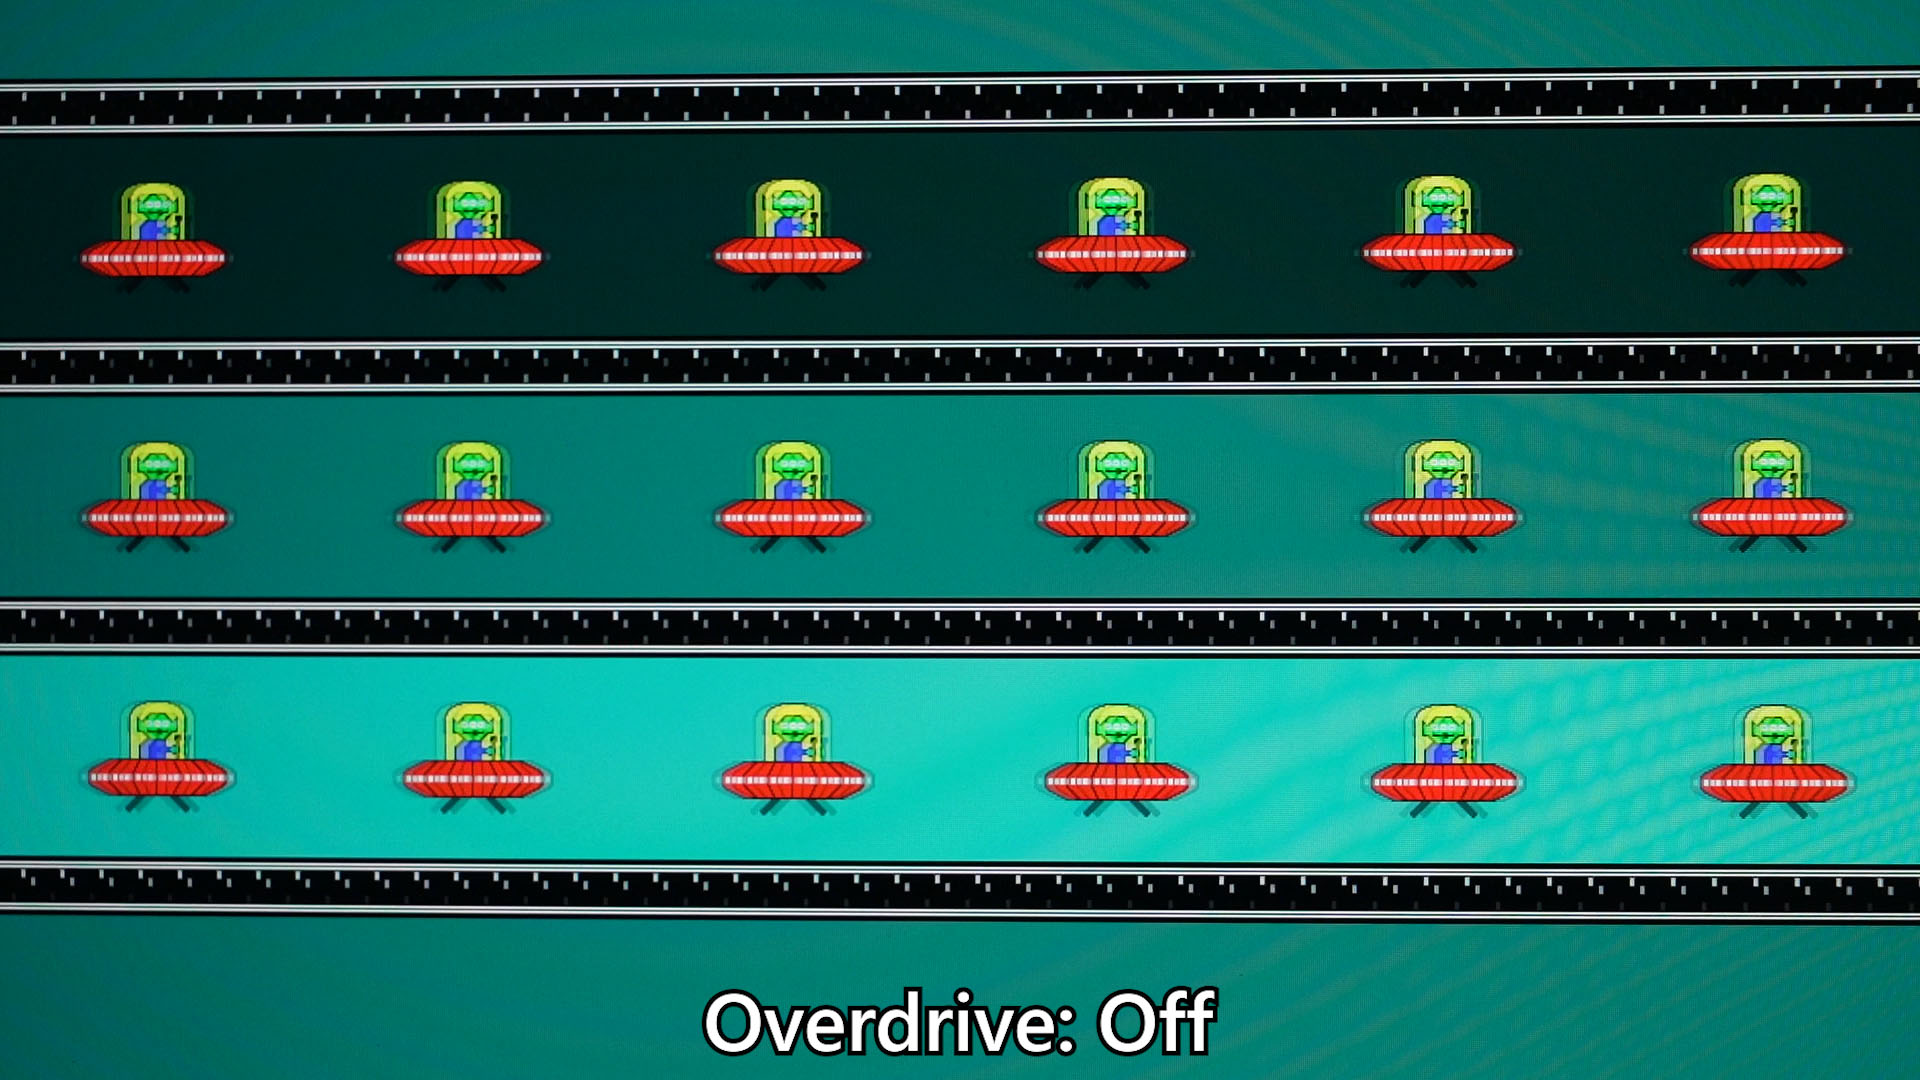
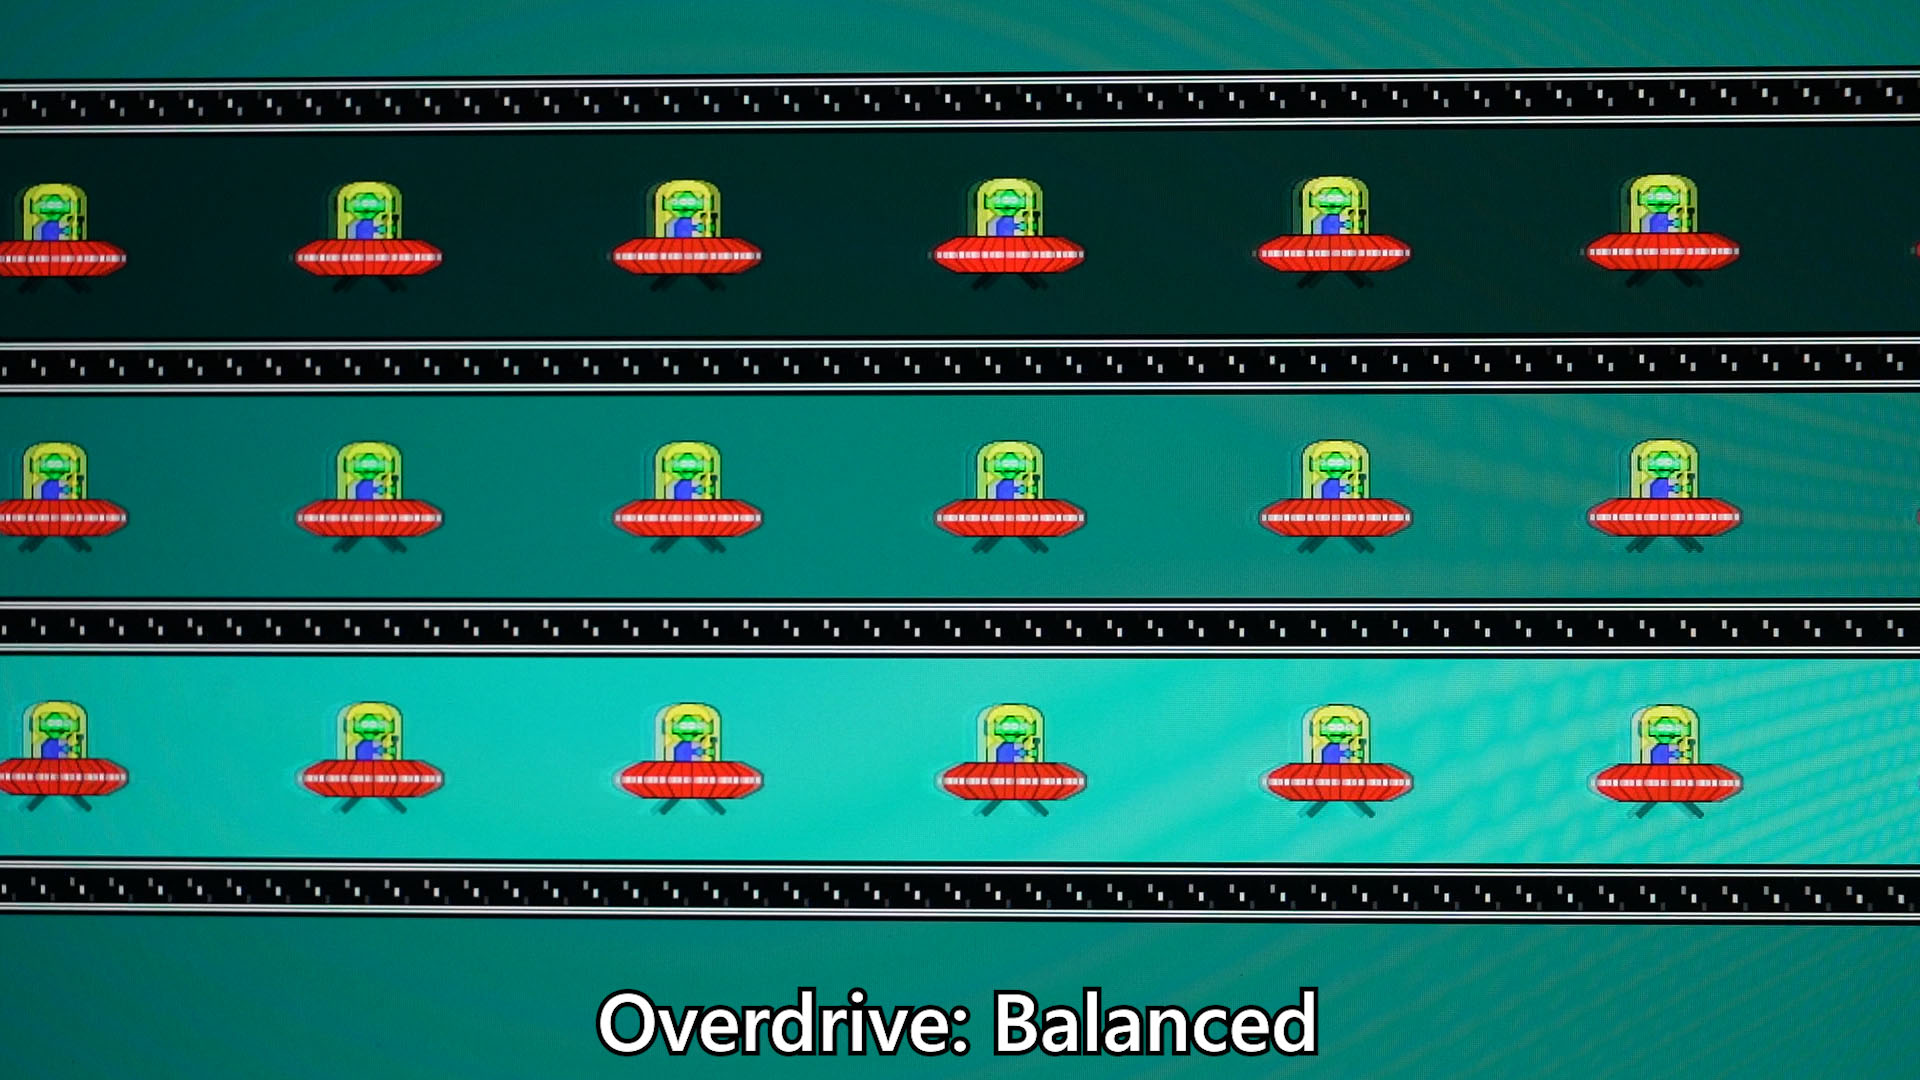
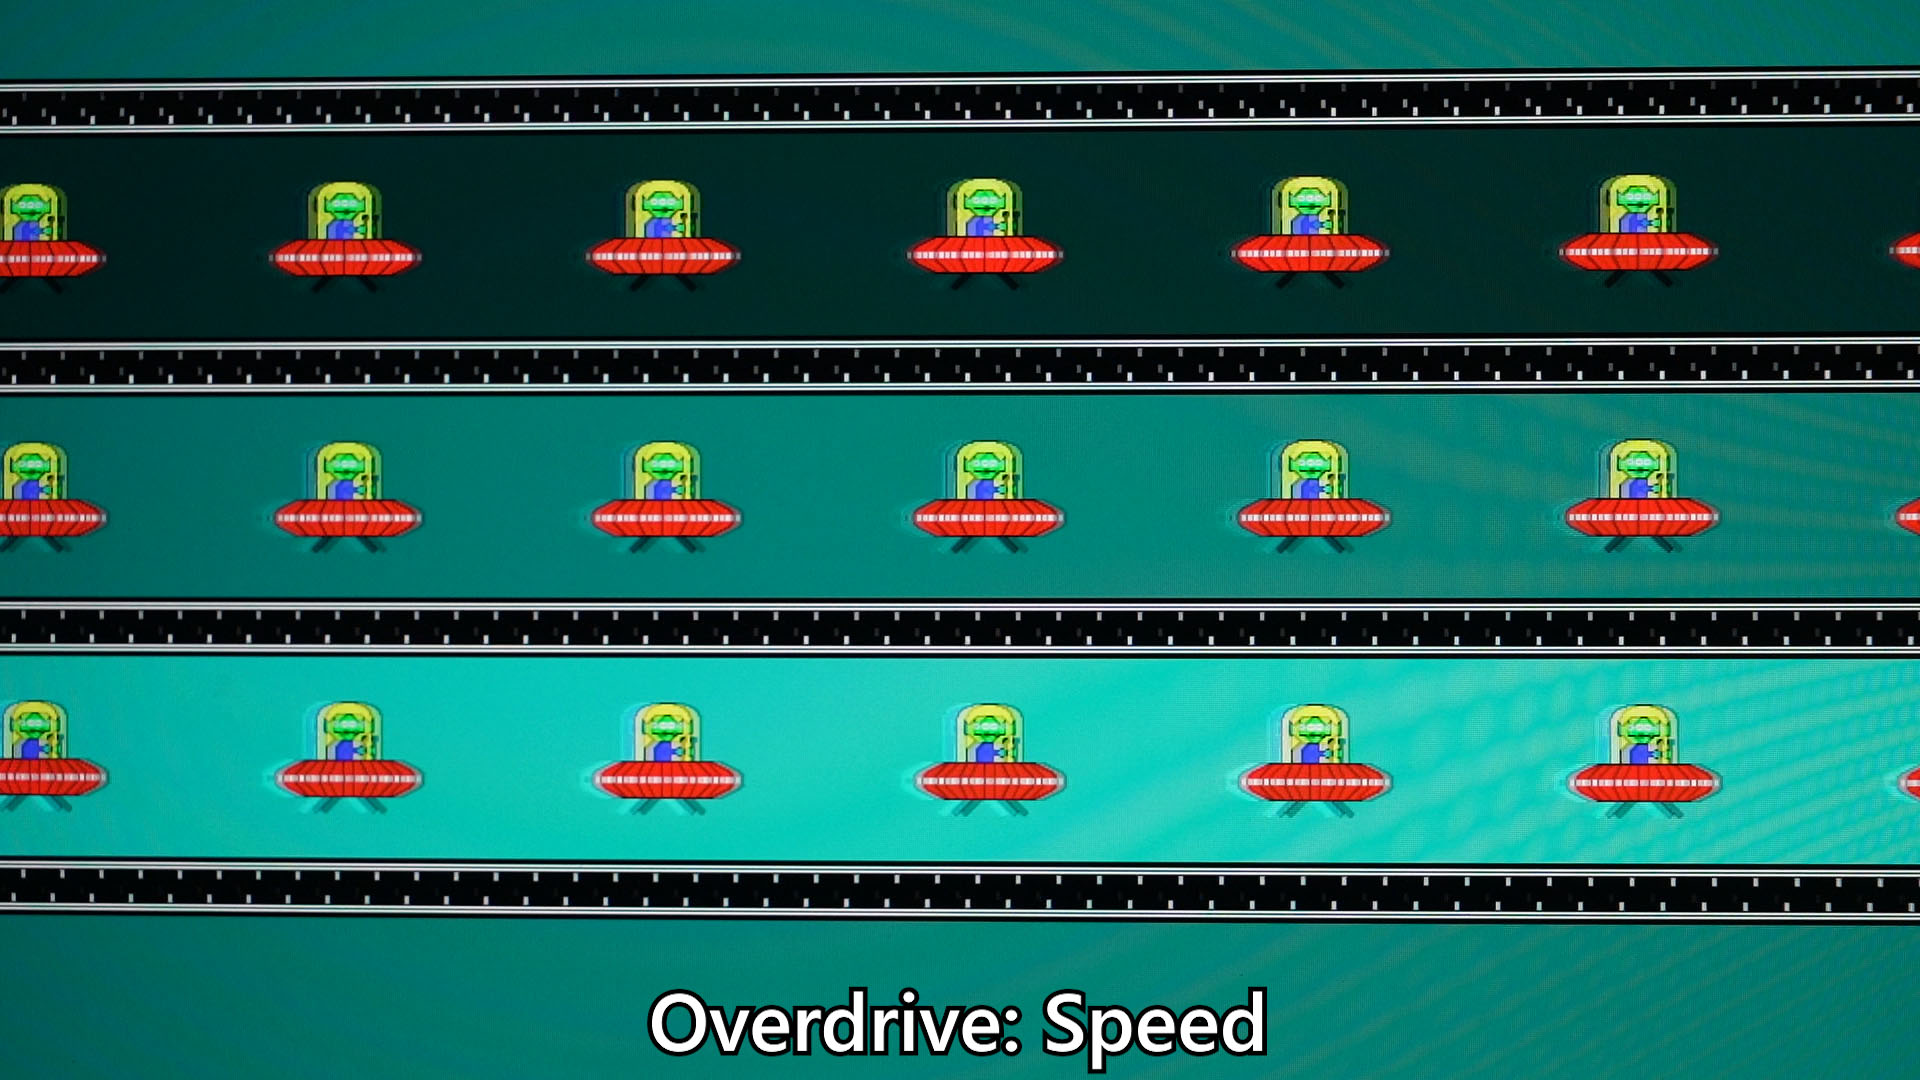
Secondly, the Overdrive option. It’s meant to cut the pixel response time and I can safely say that it does make a difference. If we turn it off, we can see a trail behind the UFO. If we turn it to Balanced or Speed (which is the maximum) then it will overcompensate and also leaves a trail.
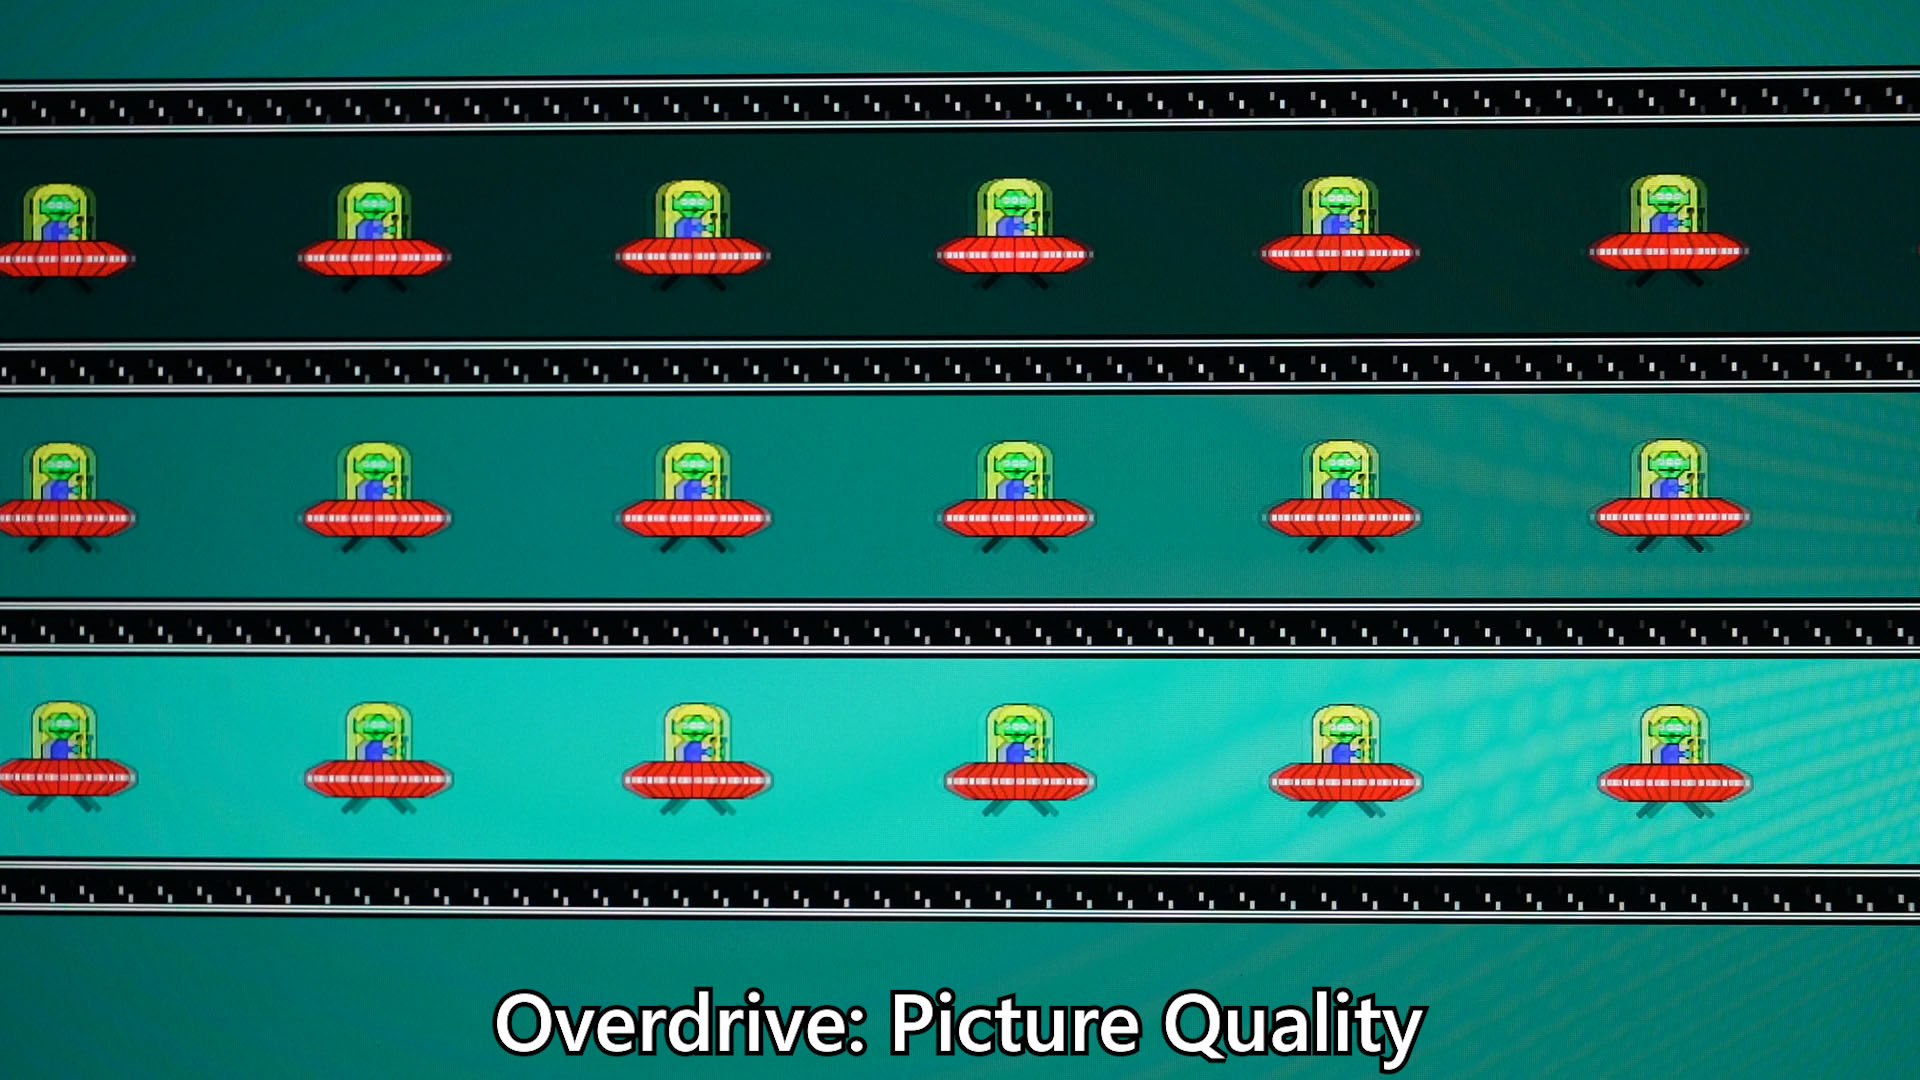
The best setting that I can recommend is using it in Picture Quality mode. There is no overcompensation and it looks great.
We also have another option here called Super Resolution which I suggest not to use since it just cranks up the sharpening and some artifacts will start to appear. So, leave it off.


Before we talk about other features, let’s talk about the ports first. It has quite a lot of ports and what I’m interested here is the USB-C port, the USB-B upstream port, and also audio jack.
- 2 x HDMI 2.1
- 1 x Displayport 1.4
- 1 x USB Type-C (Alternate Mode; Upstream port; Power Delivery up to 10W)
- 2 x USB 3.2 Downstream ports
- 1 x USB 3.2 Upstream port
- 1 x Earphone Jack

If we plug in all the cables as shown in this diagram here, we can use the KVM feature that is built into the monitor. And that is exactly what we’ve done on this setup here. I can start working on the laptop and when I’m done, just change the settings on the OSD menu and all of a sudden, the same keyboard, video, mouse, and even audio will change to the desktop – and I can use the exact same setup for gaming. That’s the beauty of KVM.

By the way, this monitor does not have a speaker so that’s why we have to plug in our speakers to the audio jack of this monitor.
However, this monitor only outputs 10W maximum via that USB-C port. Come on now, many other KVM monitors have like 90W of power output through that single USB-C port – and we can charge our laptop or phone with it.
 10W. Yikes.
By the way, Gigabyte didn’t include any USB-C cable in the box – so have fun looking for a proper USB-C cable that works with this feature. I mean, we have some recommendations – so we’ll leave them in the description below. They’re affiliate links. If you want to know why USB-C cables are confusing, then we have another video as well.
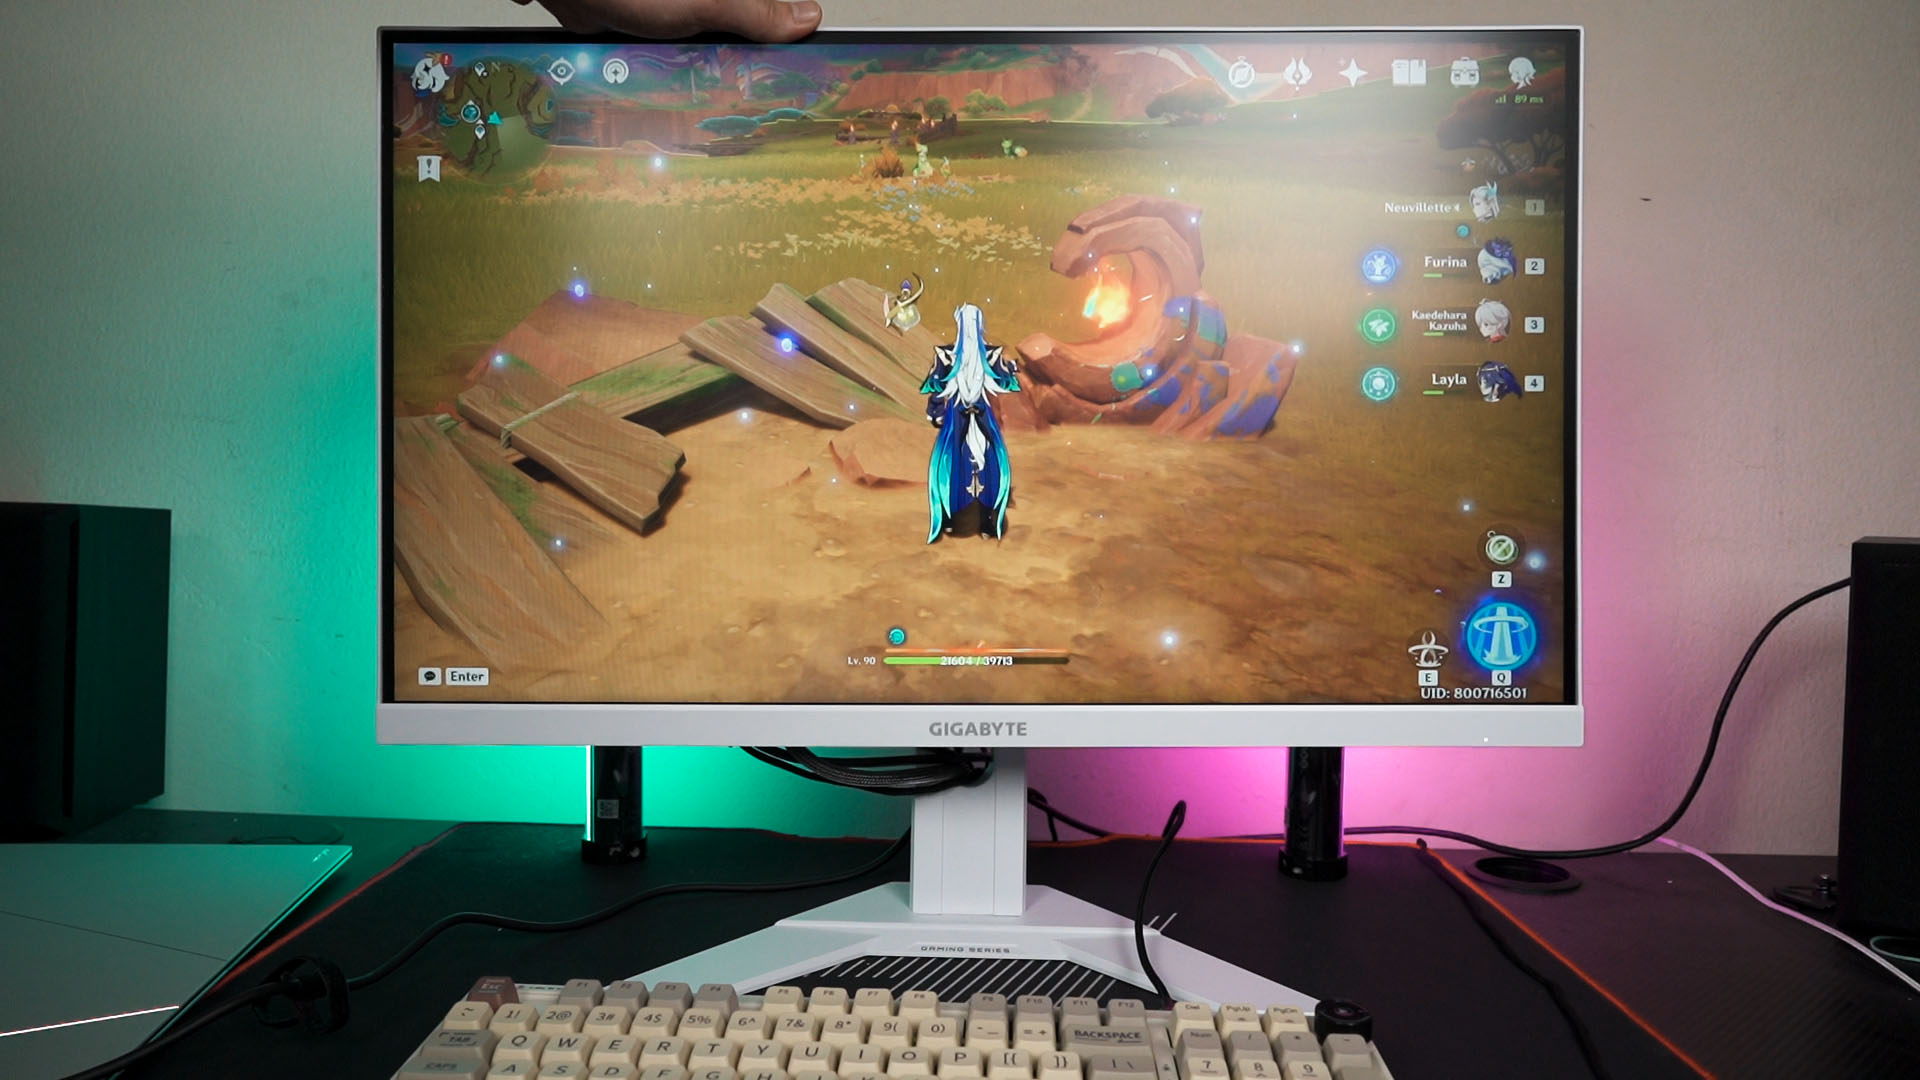
Now, let’s talk about the white bezels. Again, it’s not exactly white since it is bluish. It’s rare to see monitors with this color because the screen bezels are black and some people do find the white bezels to be a bit distracting.

I’m impartial to any bezel colors – but I am distracted by something else. You see this gap between the screen panel and the monitor’s housing? Yeah, that gap is distracting. I can even see the plastic rails inside too.

Moreover, the panel is slightly curved around the corners but the monitor housing is completely squared. That leaves a gap in between, and… it’s just distracting.

Also, the monitor stand is pretty barebones. We have both tilt adjustment and height adjustment – which are arguably the two most important adjustments on a monitor.
We can also swap the monitor stand for a monitor arm since it supports the standard 100mmx100mm VESA mount.

Cable management is pretty basic since we have a hole on the stand – and that’s about it. One thing that I need to highlight is that this monitor uses an external power supply. It’s easy to replace if it breaks, but we have another power brick to hide to keep our desk tidy.

Should you buy the Gigabyte M27QA ICE?
And finally – the price. The Gigabyte M27QA ICE is priced at around RM1,200 depending on where you get it from. All in all, it’s a great monitor for that price and it is indeed a good-looking one. It would’ve been perfect if the USB -C port can output 90W of power. And maybe add more USB ports to the monitor so I can connect everything to it.

That’s all we have to share with you today – do remember to like and subscribe – and we’ll see you guys in the next video.
Where to buy? (Affiliate link)


