


On one side, we have the specifications while the other side indicates which SKU is in the box along with some useful serial numbers I’m sure…


The accessory box is unlike any accessory box of BitFenix chassis we’ve previously reviewed, looks rather premium we’d say.

The Chasiss


Turns out that they are held onto the chassis via the metal stubs on the side panel and a catch-mechanism on the chassis.

We do notice some blemishes on our unit and we’re equally puzzled of the existence of the threaded socket beside these stubs as well.


Glad to see that the aluminium pieces are secured with a flat-headed screw, this means that the aluminium pieces that adorns the chassis can be completely removed for customization.

At the back of the Pandora, we have an I/O shield cutout, five ventilated expansion slots and a PSU mount at the bottom.

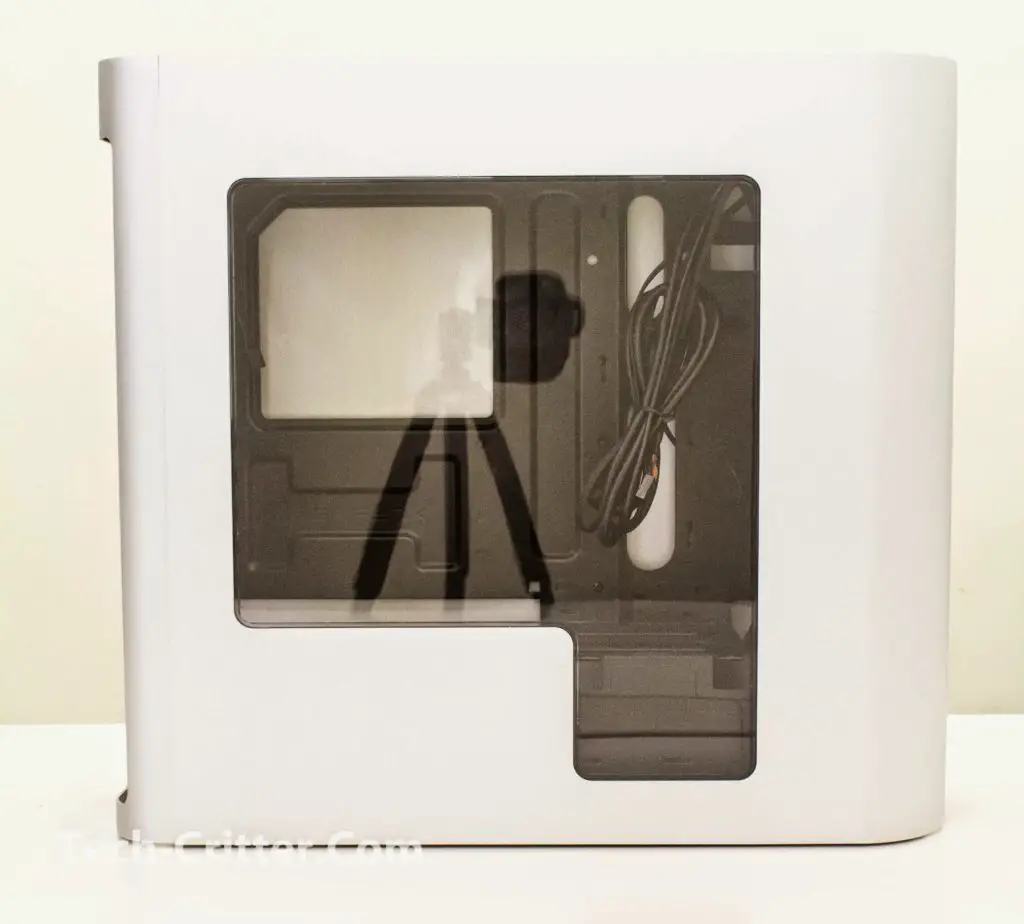
With both side panels removed, the front bezel reveals vents to cater for intake of fresh air. The reflective nature of this works especially well with the side panels on… not so much with them off…and do take note that this is a big fingerprint magnet.

Rest assured that there is an easily removable magnetic dust filter just behind that.

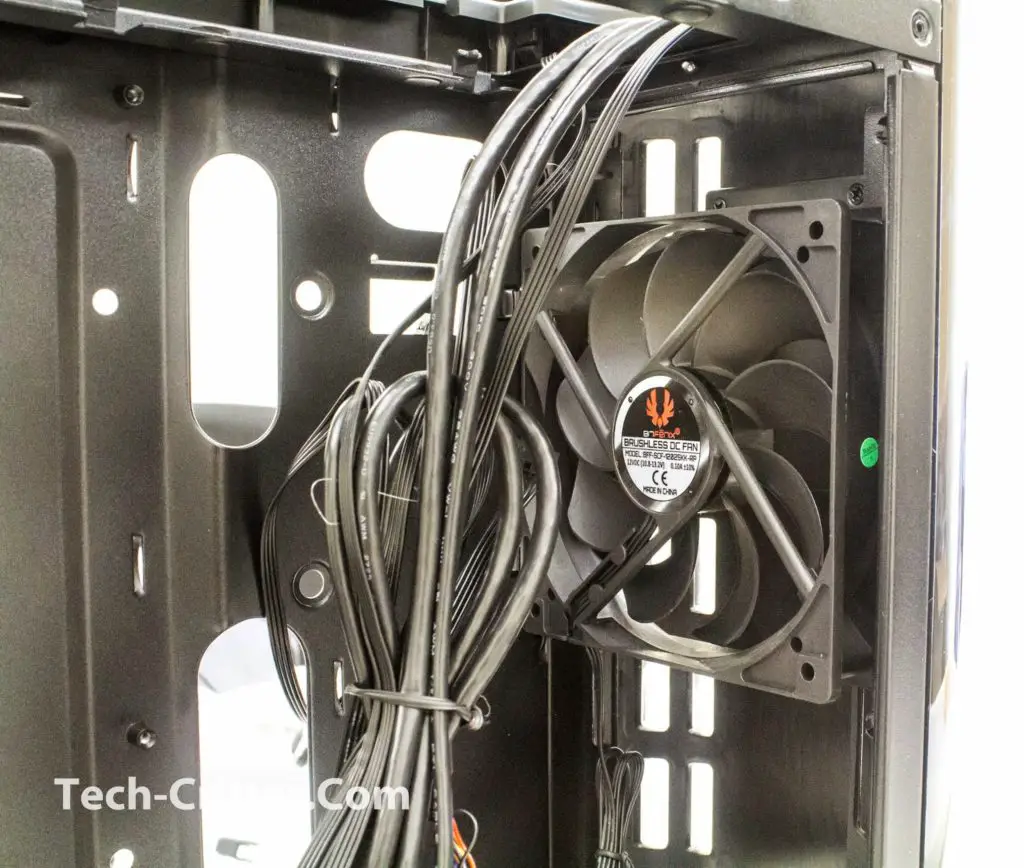
Which housed a pre-installed 120mm fan. Another 120mm fan can be mounted here and yes support for a 240mm radiator as well.

This is the main characteristics of the Pandora as behind the front panel lies a small LCD panel that was invisible from the outside. This will show the Bitfenix logo by default but the image is customisable via a simple drag & drop software downloadable from Bitfenix’s website; we’ll get back to this once we have the system built and fired up.

At the top front of the Pandora is where the I/O is located. As you can see, there is the power and reset switch, a pair of USB3.0 ports and audio ports for your headphone and microphone. The rest of the top panel is a dust filter.

The top dust filter is also a painless affair to remove, just push the left side…..

and the dust filter just swings open. Another 120mm fan is housed here for exhaust.

The latch on the top filter is rather small and looks to be a bit fragile so exercise some caution.

I’m really glad to see the cables being all black, this should help minimize cable clutter.

A full view of the top section, notice that while there is space for another 120mm there are no mounting points for it. The mounting points are for a 3.5″ drive which we’re not really a fan of really.

At the bottom of the Pandora you’ll find a dust filter where the power supply unit is installed and 4 rubber feet with metal rings.


The dust filter is attached to the bottom of the chassis magnetically so cleaning is made easier and zero worries of breaking the sliders on most conventional dust filter design.

The front dust filter earlier is also accessible front the bottom of the chassis.

The sliding mechanism makes removal a breeze without having to remove the front panel, which is rather troublesome to begin with.

Taking in the full view of the interior, it is a pretty basic MATX chassis layout… minus the 5.25″ and 3.5″ drive bays that is normally found towards the front of the chassis.


Similar to both Neos and Comrade, the Pandora comes with a plastic cover for its PCIe expansion slots to keep the screws out of sight.


As we’ve mentioned earlier, the Bitfenix Pandora comes with a customisable LCD panel that allows you to display almost any image aside of the default Bitfenix logo via a very simple drag & drop utility known as the Pandora Display APP.
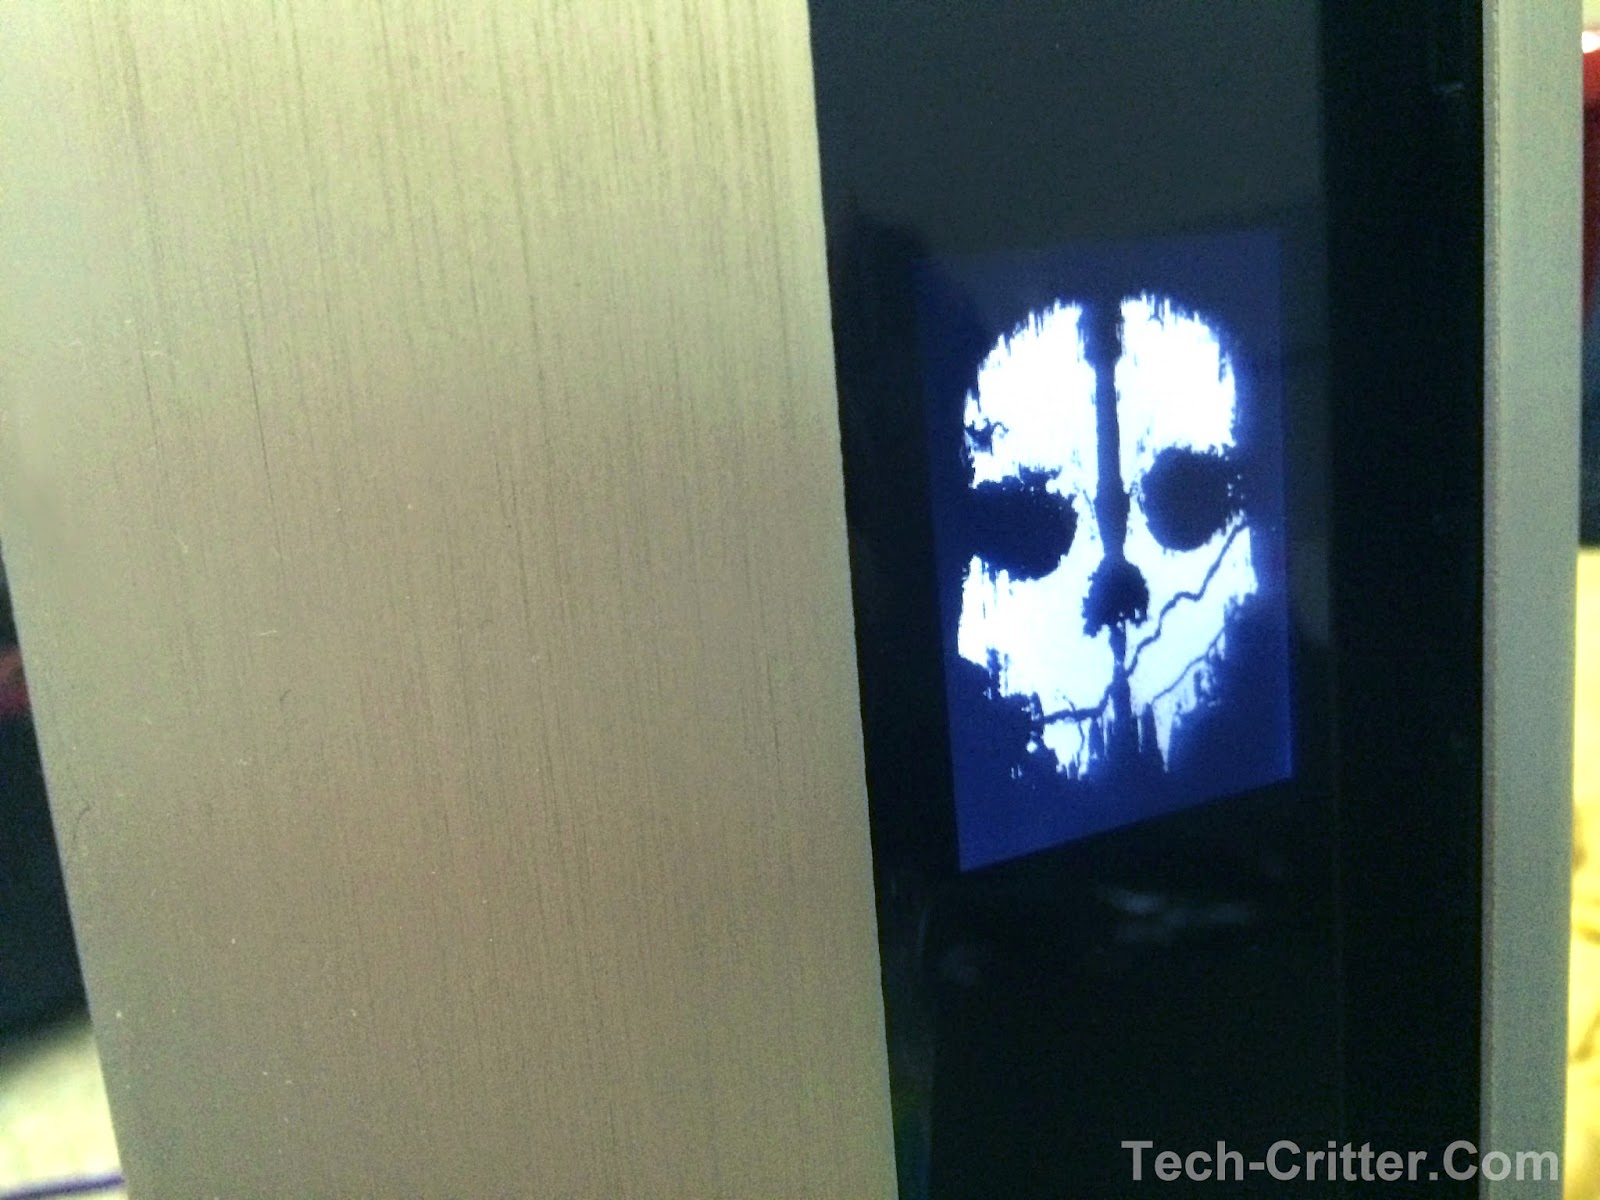
The Pandora Display APP is very easy to use and all you need to do is to drag the desired picture to the BitFenix ICON and wait for the the magic to happen. It’s recommended to use image in resolution of 240×320 and JPEG/PNG format.
Test Rig Configuration | |
CPU Cooler | Prolimatech Samuel 17 |
CPU | Intel Core i7 4790K |
Motherboard | ASUS Maximus Gene VI |
Memory | Corsair Vengeance Pro 8GB@1600MHz |
Primary Hard Drive | Kimtigo KTA-350 120GB |
Power Supply | BitFenix Fury 550G |
Chassis | BitFenix Pandora |
Moving on with the thermal performance test, we’re using the CPU stress test utility Prime95 with the option ‘In-place large FFTs’ and GPU stress test utility FurMark with its Furry Donut stress test for maximum heat output from both the CPU and GPU. Our room temperature throughout the test is 30ºC in average and the stress test is repeated for several times in order to get a stable temperature reading. The final result is presented in the following graph:
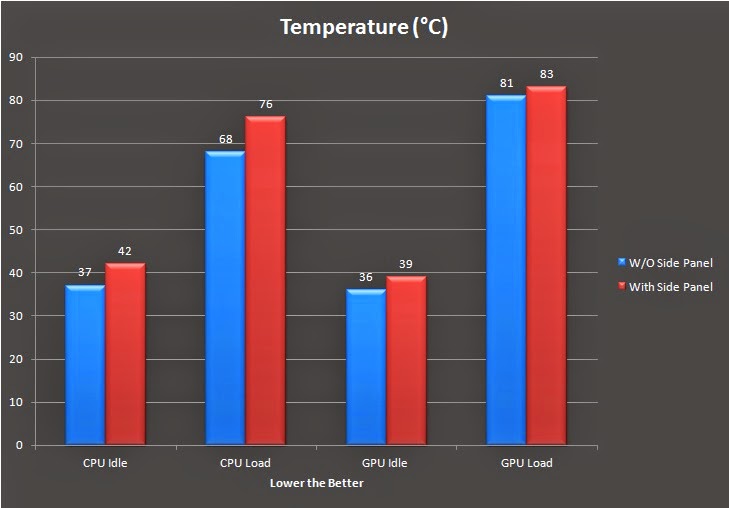
Do note that it is very unlikely for both components to hit this temperature reading in most of real world usage (gaming, office work, music, video,etc) as both CPU/GPU are being stressed to the limit only for performance testing purposes.
Due to the fans included doesn’t seems to be doing well with the airflow design of the chassis the temperatures we’re getting is higher than we’ve expected. Replacing the existing fans with high performance fans in positive pressure is recommended to improve the air circulation in the chassis.
Conclusion
- Great aesthetics
- Programmable LCD screen with easy to use drag and drop software
- New outlook for HTPC or small systems
- Support 240mm radiator at the front
- Support graphics card up to 378mm in length
- Finish of side panel is rough, may cut user
- Included fans isn’t powerful enough for its intended positive pressure fan setup
- Too little space behind the motherboard tray for cable management
- Front plastic panel glossy finish is a fingerprint magnet and prone to scratches